What Does a Marker Do in Premiere Pro? How to Make It? – A Demo
Markers in Premiere Pro help you organize and streamline your editing by marking important points on the timeline or clips. You can use them to add notes, sync edits, or plan cuts efficiently. In this video, we’ll cover what markers do, how to create them, and some practical ways to use them in your workflow. Whether you’re a beginner or an experienced editor, markers can save you time. Let’s get started!
This video is from our Adobe Premiere Pro for Beginners Course.
Video Summary
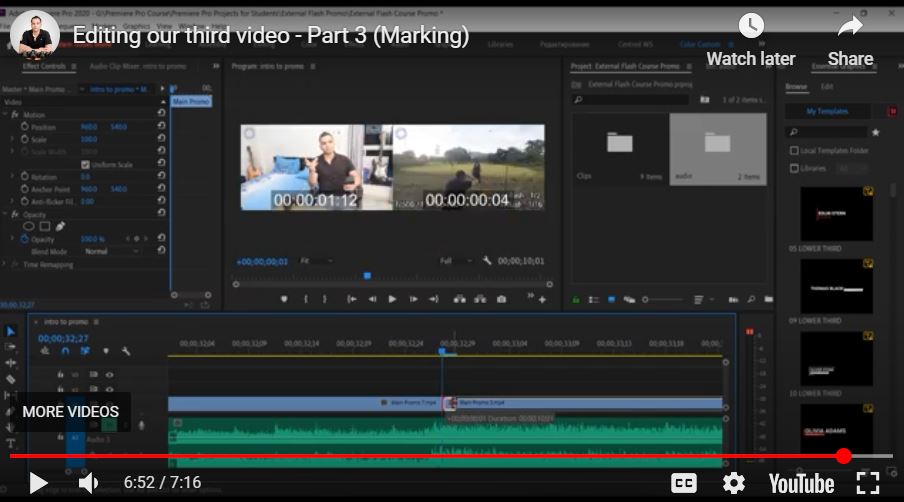
In this Premiere Pro tutorial, the instructor demonstrates how to synchronize video action with a musical beat to create a more impactful and professional-looking promo. By using the Marker tool, he aligns a visual “flash” from a studio light with a sudden tempo change in the audio track.
Important Timestamps
- 0:24 – Identifying the Beat: Listening for the sudden increase in tempo and volume in the audio track.
- 1:20 – Visual Matching: Finding the specific video frame where a speedlight (flash) goes off to match the musical hit.
- 1:43 – Precision Zooming: Using the zoom bar to stretch the timeline and find the exact frame of the flash.
- 1:57 – Using Markers: Introducing the “M” keyboard shortcut to place a marker on the exact frame in the video clip.
- 2:21 – Marking the Audio: Identifying the spike in the audio waveform and pressing “M” to mark the beat.
- 3:11 – Synchronizing Clips: Moving the video clip until its marker aligns perfectly with the audio marker.
- 4:29 – The Result: Playing back the synchronized sequence to verify that the flash and beat occur simultaneously.
- 5:04 – Gap Filling: Managing the timeline by inserting extra footage (Promo 7) to fill the space created by moving the synchronized clip.
- 6:39 – Final Cleanup: Trimming unwanted frames and stretching clips to ensure a smooth, seamless transition.