How I Shot This Trick Photography Shot (by Sadiq Dastagir): Step-by-Step Tutorial
Note About the Author – This is an article written by one of our students, Sadiq Dastagir, who has done many of our Photography and Editing courses.
I am taking this opportunity to write my very first article/blog on photography.
Not too sure if I have reached that level to write on photography subject, but with Kush’s encouragement I am making this effort.
The Genre I am writing is about trick photography which we were taught in our photography classes held by Kush.
Trick photography is all about unleashing your imagination and making it come alive using your photography skills. The word trick photography itself says it all, its tricky its fun, it makes the viewer scratch its brains and makes the ambiguity factor stand out.
Trick photography is fictional mode of photo apparently which requires integration of 2 or more layers composited/blended together.
My recent picture, which I had submitted for the very 1st photography contest in our creative pad photography group, was a trick photography one. One has to be very careful while doing this kind of photography, careful means looking at the details of the photo shot.
How do you do this ?
Coming to the point now, whenever we do trick photography we always take 2 shots since we later composite them (mix them /blend them).
Your main subject is the 1st shot and 2nd shot is a blank frame without your subject and its related props/elements.
Many a times its noticed that we have taken our shot but then we have captured something extra which, if erased in Photoshop will cause the picture to look absurd and really weird.
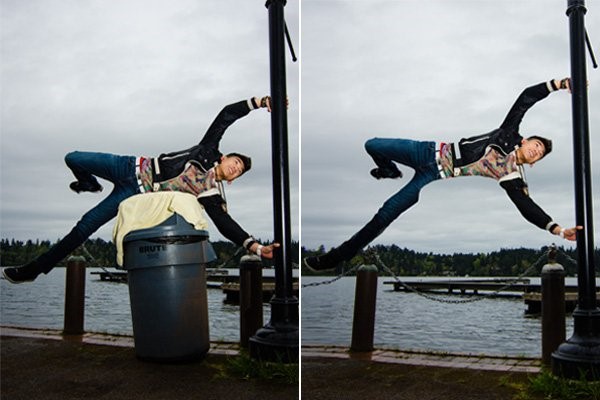
Lets look at the image below:
Image courtesy – Internet
Now notice the 1st picture, the boy has been placed on a bin and the bin is interfering with the boy’s rib cage area and also the waist and hip, as a result look at the 2nd image, when Photoshop was used to erase or mask out the bin the boy’s body proportion went for a complete toss.
This is what I meant by being careful, one needs to really ensure that the subject doesn’t get lost or covered by such elements where the above picture is the end result.
Coming to the trick photograph which I clicked:
Observe the picture here carefully.
Image -01 – Courtesy – Original Photo by Sadiq
- You will notice that the hands of the subject are not going beyond the photo frame.
- The waist area of the subject is beyond the frame, which is intentionally done.
- Have taken great care to ensure that non of the elements go beyond the frame or else during the edit in Photoshop, the picture would look weird like in the example given above.
Now lets look at the blank frame:
Image -02 – Courtesy – Original Photo by Sadiq
- Now this picture was taken “AFTER” I took the master image, the above image.
- This is our base layer.
- This shot was taken so that we can use it as a support background when we erase out the portion using Photoshop starting from waist area and making the picture look as the Original Trick photograph.
- Image 01 & 02 both have been taken in same focal length and position with MANUAL FOCUS.
Essentials points/tips for such photography:
- Very important point to be noted here, for such shots TRIPOD is compulsory no matter what.
- You HAVE to shoot on MANUAL FOCUS mode.
- Use AUTO FOCUS to first focus on the subject and then move the switch to MANUAL mode and keep it there untouched.
- Always shoot your blank image on manual mode and shoot after you have taken/shot your master shot so that the focus & frame both remain intact.
- If you don’t do this once you shoot the image, when you shoot the blank frame your focus will automatically shift to something else and both your images will now have separate focal planes, which will result in scrapping your image.
- During editing both your shots will clearly show different areas in focus, which defeats the purpose.
- Both your shots have to be taken in same angle, focal length and position, little bit shift and its all gone, that’s why TRIPOD is needed.
- Slight shift in position will result in extra effort and time waste in Photoshop.
- Best is to shoot on tripod using remote so that there isn’t in any shift at all.
- Always ensure your subject isn’t interfered by any obstacle, which will be a problem in editing.
- Always shoot on RAW mode since it’s the best way to enhance and edit your picture.
- Since I have not moved the TRIPOD at all editing will be very easy and perfect.
Coming to the editing part now:
After I was satisfied by the shot I have taken, both the master shot (with subject) and then the blank frame, I imported the master shot into Adobe Light room.
The parameters I worked upon in Adobe Light room were:
- Clarity – For getting more details
- Selective coloring – For customizing some colors to stand out and others to stay subtle.
- Used exposure curve to simmer down the exposure.
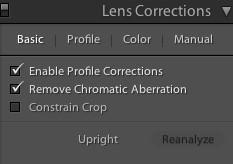
- Enabled Profile corrections – To ensure the image gets flatter/even, and not concaved.
- Remove Chromatic Aberration – This removes any kind of abnormalities on the edges of the subject, you can GOOGLE this for more details.
The parameters I worked upon in Adobe Photoshop were:
- Now comes the finishing part and the interesting one.
- I first opened the blank frame in Photoshop then imported the master layer and over lapped it over the blank frame.
- Now my top layer is the Master layer and bottom layer is my blank layer.
- I used the eraser tool and began erasing the master layer from the leg side, till the waist area.
- Using the Lasso selection tool to select, I then carefully erased the remaining portion.
- With the above editing my image was now ready, the bottom half of the body was erased and looked as if its just not there.
- I then cropped off the unwanted space and my image was ready.
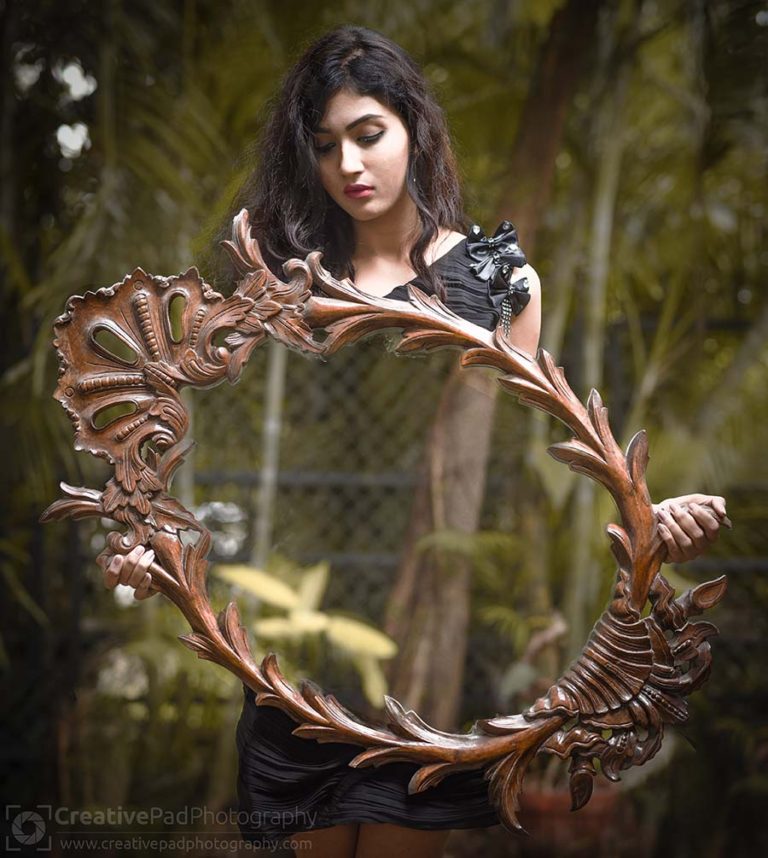
The final Image:
What gear I Used to shoot my Picture:
- Canon 5D Mark iii
- 50 mm – 1.8 Prime Lens
- Vanguard Tripod
Shot Settings:
- ISO – 100
- f – 2.5
- Shutter Speed – 1/2000 Seconds (Burst Mode since I had blown bubbles)
- Focal Length – 50 mm
With this my blog post on trick photography comes to an end.
Thank you for reading and I hope it helped you.
By the way, if you are someone who is still on the fence regarding Kush’s online courses; take it from me, he’s really the best teacher out there. Don’t even think twice. You will never regret purchasing his course.


