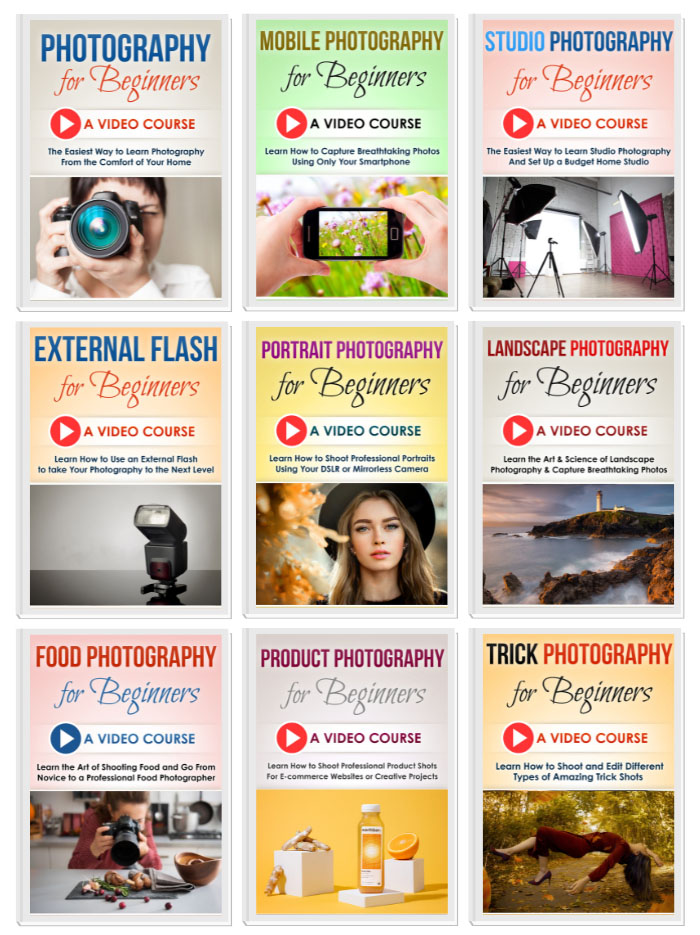
Course #1 - DSLR Photography for Beginners (45 videos)
This online course teaches you how to use your DSLR/Mirrorless camera from A to Z and how to master shooting in the Manual Mode.
It’s the perfect course for beginners. It contains 45 videos and 6.5 hours of video content.
- Introduction to the course (2 Videos)
- Introduction to the Lens (3 Videos)
- Getting Started with Manual Mode (1 Video)
- ISO (4 Videos)
- Shutter Speed (7 Videos)
- Aperture (5 Videos)
- Using the Tripod (3 Videos)
- Important Settings and Functions (4 Videos)
- Flash Photography Basics (4 Videos)
- Landscape and HDR Photography (3 Videos)
- Long Exposure Photography (3 Videos)
- Editing and Post-Processing in Lightroom and Photoshop (5 Videos)
- Conclusion (1 Video)
Course #2 - Mobile Photography for Beginners (40 videos)
This online course teaches you how to master your Smartphone to capture breath-taking photos. It doesn’t matter whether you have an Android or an iPhone. You can do this course no matter what type of phone you have.
It contains 40 videos and 6 hours of video content.
- Introduction to the Course
- Some Important Points to Know
- Cleaning the Smartphone Lens
- How to Hold Your Phone for a Sharper Photo – Part 1
- How to Hold Your Phone for a Sharper Photo – Part 2 (Selfie Stick Tripod)
- How to Focus and Correct Exposure
- Understanding Zooming in and out (Digital Zoom)
- Understanding Aspect Ratio and Phone Camera Sensor
- Walkthrough of all the Camera Settings in a Phone
- Hard Light vs Soft Light – Part 1
- Hard Light vs Soft Light – Part 2
- Rule of thirds, Symmetrical Composition and Leading Lines
- The Principle of Isolating the Subject
- The Principle of Directional Lighting
- The Principle of Zooming in – Digital Zoom vs Optical Zoom – Part 1
- The Principle of Zooming in – Digital Zoom vs Optical Zoom – Part 2
- Food and Product Photography Using a Mobile – Part 1
- Food and Product Photography Using a Mobile – Part 2
- Mobile Macro Photography Using an External Clip-On Macro Lens – Part 1
- Mobile Macro Photography Using an External Clip-On Macro Lens – Part 2
- Editing the Macro Shot in Photoshop Using Focus Stacking
- Using the Pro Mode on the Smartphone – Part 1
- Using the Pro Mode on the Smartphone – Part 2
- Light Painting Using a Slower Shutter Speed
- Shooting Light Trails Using a Smartphone
- Shooting Videos Using Smartphone – The Set up and Settings
- Editing Videos Using a Free Video Editing App
- Miscellaneous Modes and Settings – Portrait Mode, Food Mode, Panorama Mode
- Miscellaneous Modes and Settings – Night Mode, Auto HDR
- Editing Using Snapseed (Flower Shot) – Part 1
- Editing Using Snapseed (Flower Shot) – Part 2
- Editing Using Snapseed (Light Painting Shot)
- Editing Using Snapseed (Food and Product Shot)
- Editing Using Snapseed (Macro Shot)
- Editing Using Snapseed (Light Trails Shot)
- Editing Using Snapseed (HDR Edit)
- Using a Gimbal Stabilizer to Shoot Better Videos
- Using a Mobile Waterproof Pouch
- Using an External Microphone for Videos
- What Type of Smartphone is Good for Photography?
Course #3 - Studio Photography for Beginners (31 videos)
This online course teaches you the are of studio photography by showing you how to set up a home-based budget photography studio.
The entire process is shown, right from shooting studio portraits using a DSLR or Mirrorless camera to the lighting techniques.
It contains 31 videos and 4 hours of video content.
- Introduction to the course (2 Videos)
- Understanding a Strobe Light (2 Videos)
- Understanding Modifiers (2 Videos)
- Understanding the Backdrop (1 Video)
- Taking our first shot (1 Video)
- What Camera Settings to Use in Studio Photography (8 Videos)
- Understanding Light (5 Videos)
- Which Lens to Use? (1 Video)
- Lighting Set-ups (4 Videos)
- Lighting Techniques (3 Videos)
- Editing Studio Portraits (1 Video)
- Conclusion (1 Video)
Course #4 - Off-Camera Flash for Beginners (33 videos)
This online course teaches you how to use an Off-Camera Flash/External Flash to take your photography to the next level.
It covers all the technical aspects you need to know about using an off-camera flash.
It contains 33 videos and 3 Hours 40 Minutes of video content.
- Introduction to the course (4 Videos)
- Basic Settings in an Off-Camera Flash (5 Videos)
- Camera Settings and Flash (9 Videos)
- Triggering the Flash Off-Camera (4 Videos)
- Balancing Flash and Ambient Exposures in Outdoor Portraits (2 Videos)
- Using High Speed Sync (2 Videos)
- Outdoor Portrait Shoot with a Two Lights Set-up (2 Videos)
- Studio Portraits Using Flash (2 Videos)
- Extra Settings and Functions (2 Videos)
- Conclusion (1 Video)
Course #5 - Portrait Photography for Beginners (24 videos)
This course teaches you how to shoot professional portraits using your DSLR or Mirrorless camera.
It contains 24 videos and 4 hours of video content.
- Introduction to the Course
- The 5 Elements That Make a Portrait
- Examples of Different Portraits and Analyzing Them
- The Approach Which We Will be Taking in This Course
- LEVEL 1 Portrait – Shooting a basic portrait which doesn’t look good
- LEVEL 2 Portrait – Improving our Portrait by Making Changes to Framing
- Understanding the Impact of Focal Length on Our Portraits
- LEVEL 3 Portrait – Using a Prime Lens & a Wide Aperture for a Blurred Background – Part 1
- LEVEL 3 Portrait – Using a Prime Lens & a Wide Aperture for a Blurred Background – Part 2
- LEVEL 4 Portrait – Changing the Ambience to Improve our Portrait
- LEVEL 5 Portrait – Changing the Distance Between Photographer and Subject – Part 1
- LEVEL 5 Portrait – Changing the Distance Between Photographer and Subject – Part 2
- LEVEL 6 Portrait – Using a Prime Lens with a Larger Focal Length
- Which is the Best Lens for Portrait Photography? – Part 1
- Which is the Best Lens for Portrait Photography? – Part 2
- Shooting Full Body Portraits
- LEVEL 7 Portrait – Shooting in a beautiful setting and during golden hours
- LEVEL 8 Portrait – Using an Off-Camera Flash to Shoot Dramatic Portraits
- LEVEL 9 Portrait – Editing a Portrait (Color Grading) – Part 1
- LEVEL 9 Portrait – Editing a Portrait (Color Grading) – Part 2
- LEVEL 10 Portrait – Retouching Portraits – Part 1
- LEVEL 10 Portrait – Retouching Portraits – Part 2
- LEVEL 10 Portrait – Retouching Portraits – Part 3
- LEVEL 10 Portrait – Retouching Portraits – Part 4
Course #6 - Landscape Photography for Beginners (30 videos)
This course teaches you the art and science of Landscape Photography so that you can capture breathtaking landscape shots.
It contains 30 videos and 5 hours 15 min of video content.
- Introduction to the Course
- The Approach We Will be Taking in This Course
- Principle #1 – Shooting during the Golden Hours
- Principle #2 – Getting the Foreground in the Composition
- Principle #3 – Where to focus in Landscape Photography? Hyperfocal Distance
- Principle #4- Understanding the Usage of Aperture in Landscape Photography
- Principle #5- Rules of Thirds and Leading Lines Composition Principles
- Principle #6 – How to buy a good Tripod?
- Principle #7 – Using a Wide-Angle Lens
- Principle #8 – Understanding the Importance of Editing
- Principle #9 – Understanding Dynamic Range (HDR)
- Principle #10 – The Importance of Using Filters in Landscape Photography
- Using a Polarizing Filter in Landscape Photography – Part 1
- Using a Polarizing Filter in Landscape Photography – Part 2
- Using a Neutral Density (ND) Filter in Landscape Photography – Part 1
- Using a Neutral Density (ND) Filter in Landscape Photography – Part 2
- Using a Neutral Density (ND) Filter in Landscape Photography – Part 3
- Using a Neutral Density (ND) Filter in Landscape Photography – Part 4
- Using a Graduated Neutral Density (GND) Filter in Landscape Photography – Part 1
- Using a Graduated Neutral Density (GND) Filter in Landscape Photography – Part 2
- Editing a High Dynamic Range (HDR) Landscape Shot – Part 1
- Editing a High Dynamic Range (HDR) Landscape Shot – Part 2
- How to Focus Stack a Landscape Shot in Photoshop
- How to Use Bracketing for HDR Photography
- Exact Steps to Take When Doing Landscape Photography (Checklist Document)
- Shooting a Landscape Shot From Scratch – Part 1
- Shooting a Landscape Shot From Scratch – Part 2
- Editing a Landscape Shot From Scratch – Part 1
- Editing a Landscape Shot From Scratch – Part 2
- Editing a Landscape Shot From Scratch – Part 3
Course #7 - Food Photography for Beginners (29 videos)
This course teaches you how to shoot professional looking food shots and go from a novice to a professional food photographer.
It contains 29 videos and 4 hours of video content.
- Introduction to the Food Photography Course
- Six Elements That Make a Food Shot
- Examples of Images That Use the Six Elements
- LEVEL 1 SHOT – Using natural light, a phone camera and basic props
- LEVEL 2 SHOT – Using natural light, a DSLR/Mirrorless on Auto and basic props
- LEVEL 3 SHOT Part 1 – Adding a Prime lens, Manual Mode and Basic Editing
- LEVEL 3 SHOT Part 2 – Adding a Prime lens, Manual Mode and Basic Editing
- LEVEL 3 SHOT Part 3 – Adding a Prime lens, Manual Mode and Basic Editing
- LEVEL 4 SHOT Part 1 – Adding Pro Surface/Background, Video Light & Better Props
- LEVEL 4 SHOT Part 2 – Adding Pro Surface/Background, Video Light & Better Props
- Video Light vs Flash – Why I Decided to Use a Video Light for This Course
- LEVEL 5 SHOT Part 1 – Creating a Dark Food Shot With a Grid
- LEVEL 5 SHOT Part 2 – Creating a Dark Food Shot With a Grid
- Soft Light vs Hard Light for Food Photography
- LEVEL 6 SHOT – Making the light even softer by using an additional diffuser
- Editing in Snapseed – Part 1
- Editing in Snapseed – Part 2
- Editing in Photoshop – Part 1
- Editing in Photoshop – Part 2
- Editing in Photoshop – Part 3
- LEVEL 7 SHOT – Creating an Even DARKER and MOODY Food Shot – Part 1
- LEVEL 7 SHOT – Creating an Even DARKER and MOODY Food Shot – Part 2
- LEVEL 7 SHOT – Editing the DARK and MOODY Food Shot – Part 1 (Snapseed)
- LEVEL 7 SHOT – Editing the DARK and MOODY Food Shot – Part 2 (Photoshop)
- LEVEL 7 SHOT – Editing the DARK and MOODY Food Shot – Part 3 (Photoshop)
- LEVEL 7 SHOT – Editing the DARK and MOODY Food Shot – Part 4 (Photoshop)
- LEVEL 8 SHOT – Adding Action to the Food Shot – Part 1
- LEVEL 8 SHOT – Adding Action to the Food Shot – Part 2
- Some Important Points
Course #8 - Product Photography for Beginners (27 videos)
This course teaches you how to shoot professional product shots using a budget set-up which can be used for e-commerce website product photos or for creative product shoots.
It contains 27 videos and 3.5 hours of video content.
- Introduction to the Product Photography Course
- Why We Will Be Using a Continuous Light Source
- Shooting with White Background and Surface – Part 1
- Shooting with White Background and Surface – Part 2
- Creating RGB White Background in Photoshop – Part 1
- Creating RGB White Background in Photoshop – Part 2
- Creating RGB White Background in Photoshop – Part 3
- Shooting with Black Background and Surface
- Batch Editing in Lightroom
- An Important Point About PVC Backdrops
- Introduction to the Removing Reflections Section
- Removing Reflections By Avoiding Direct Light and Changing Angles
- Removing Reflections By Diffusing the Reflection
- Shooting Sunglasses/Shades Using a Light Tent
- Shooting Products With Plastic Surface – Part 1
- Shooting Products With Plastic Surface – Part 2 (Editing)
- Shooting Cutlery (Spoon) Without Reflection
- Editing Cutlery (Spoon) Shot – Part 1
- Editing Cutlery (Spoon) Shot – Part 2
- Shooting and Editing Glassware Without Reflection
- Understanding a Scrim and Some Additional Points
- Introduction to the Creative Product Shoot Section
- Explanation of the Set-up for the Beverage (Beer Bottle) Shot
- Shooting a Commercial Beverage Shot With a One Light Set-up
- Editing the Beverage Shot by Creating Composite of Four Shots in Photoshop
- Retouching the Beverage Shot to Get the Final Result
- Conclusion to the Course
Course #9 - Trick Photography for Beginners (35 videos)
This course teaches you how to shoot and edit some amazing trick shots.
It contains 35 videos and 5 hours of video content.
#1 – Introduction to the Course
Levitation Trick Photography
#2 – Levitation Photography Shoot Part 1
#3 – Levitation Photography Shoot Part 2
#4 – Levitation Photography Editing in Photoshop Part 1
#5 – Levitation Photography Editing in Photoshop Part 2
#6 – Levitation Photography Editing in Photoshop Part 3
#7 – Levitation Photography Editing in Photoshop Part 4
#8 – Examples of Levitation Shots (And Similar Trick Shots) With the Set-ups
Levitation Photography for Small Floating Objects
#9 – Levitation Photography for Small Floating Objects
Miniature Trick Photography
#10 – Two Shot Set up for Miniature Photography
#11 – Editing the Miniature Shot in Photoshop – Part 1 (Creating a Selection)
#12 – Editing the Miniature Shot in Photoshop – Part 2 (Refining the Selection)
#13 – Editing the Miniature Shot in Photoshop – Part 3 (Retouching the Selection)
#14 – Editing the Miniature Shot in Photoshop – Part 4 (Final Selection and Scaling)
#15 – Editing the Miniature Shot in Photoshop – Part 5 (Creating Shadows)
#16 – Editing the Miniature Shot in Photoshop – Part 6 (Creating Shadows)
#17 – Editing the Miniature Shot in Photoshop – Part 7 (Syncing the Color Balance)
#18 – Editing the Miniature Shot in Photoshop – Part 8 (Scrutinizing the Final Image)
#19 – Examples of Miniature Shots with Set-ups and Applying Dodge and Burn (Sculpting)
#20 -Using Patch Tool and Clone Stamp Tool to Add Texture
Forced Perspective Trick Photography
#21- Intro to Forced Perspective Trick Photography
#22 – How to Shoot Forced Perspective Shots
#23 – Editing the Forced Perspective Shot in Photoshop – Part 1
#24 – Editing the Forced Perspective Shot in Photoshop – Part 2
#25 – Editing the Forced Perspective Shot in Photoshop – Part 3
Clone Photography
#26 – Clone Photography – How to Shoot Part 1
#27 -Clone Photography – How to Shoot Part 2
#28 -Clone Photography – Editing in Photoshop – Part 1
#29 – Clone Photography – Editing in Photoshop – Part 2
#30 – Clone Photography – Editing in Photoshop – Part 3
#31 – Clone Photography – Editing in Photoshop – Part 4
Creating an Advanced Composite Trick Shot
#32 – Creating an Advanced Composite Trick Shot – Part 1
#33 – Creating an Advanced Composite Trick Shot – Part 2
#34 – Creating an Advanced Composite Trick Shot – Part 3
#35 -Creating an Advanced Composite Trick Shot – Part 4
Here are some amazing benefits..
Access to our Facebook Group
When you purchase this Photography and Videography courses package, you will get access to our members-only Facebook group where you can post your photos, ask questions and doubts and interact with other members.
Lifetime Access to Videos
You get lifetime access to all the videos and all the courses in this Photography and Videography Courses Package. There is no expiry or validity. You can watch the videos at any given time according to your convenience.
Instant Access to Videos
You get access to all the videos and courses instantly. The moment your payment goes through you will receive the videos and you can start watching the videos in a matter of seconds.
No Hidden Costs
There are no hidden costs. You get access to all the videos and online courses specified on this page. You will never be asked to pay again.
Watch on Any Device
You can watch the videos on any device like a laptop/PC, mobile, tablet, etc.
Get a Personalized Certificate
Pass a small test which is given along with this Photography and Videography courses package and get a personalized certificate.
How to Buy
The buying process is very simple:
- Just click on the ‘BUY NOW’ button below and you will be taken to the payment page.
- Fill up the form there and make the payment.
- The moment your payment goes through, you will be redirected to a page which has the link to download the course file. There is also a video on that page which will show you how to access the videos.
Rs. 14,999 999 (96% OFF)
IMPORTANT – This offer is strictly for a limited time. It will expire very soon so don’t miss out!
Have a LIVE chat with us
What our students are saying..
These are just some of the 400 plus reviews we have got on Google. You can type “Creative Pad Media” in Google and see all our reviews.


About your trainer
Hey there. This is Kush Sharma, your photography and videography trainer and the founder here at Creative Pad Media.
I have been teaching photography and videography since 2013 and have taught over 55,000 students via my online courses and workshops.
My online courses have been downloaded in over 170 countries.
I have created this special Photography and Videography courses package so you can learn everything in one place.
I hope I get a chance to teach you this beautiful art.
Our Proud Stats (Since 2013)
Countries
1
Our online courses have been downloaded in over 170 countries
Students
1
We have served over 55,000 students via our online courses and workshops
Google Reviews
1
We have over 400 reviews on Google. More than 90% of our reviews are 5-star reviews.
Have a LIVE chat with us
FAQ
Most frequently asked questions
Yes, that is right. You will get access to all the courses in this Photography and Videography courses package instantly after payment.
After your payment goes through you will be automatically redirected to a Download Page which will have a download button.
Once you click on this button, a zip file will download.
Just unzip the file and you will find all courses arranged in folders.
Inside each folder is a PDF file in which all the links of all the videos of each course are given.
On the download page, there is a detailed video that will show you how to do this.
No, we don’t allow downloading of the videos due to piracy issues.
You will need the internet to watch the videos.
But you get lifetime access to the videos.
It’s always better if you have a camera for practical learning.
But even if you are planning to buy a camera later on it’s fine since you get lifetime access to all the videos.
Yes, one of things you will get when you buy this package is a document that has the list of cameras we recommend for beginners according to different budgets.
We have a private Facebook group for our buyers. Once you buy this Photography and Videography courses package you will get access to this group.
In this group you can post your photos/videos as you learn, interact with other members and ask any questions or doubts.
No, you can use the website called Photopea.com, which is a replica of Photoshop and is completely free.
We have created the Mobile Photography course in such a way that it doesn’t matter what type of phone you have. You will be able to follow the course and master your Smartphone.
Want to buy these courses individually?
Our online courses can also be purchased individually via Udemy.com. Please note that we don’t have any control over the price as it is determined by Udemy. So you will end up paying more than buying them as a bundle. Use the button below: